Tuesday, April 4, 2017

Hashtag VR Stealth

So, like anyone else who's ever strapped an HTC Vive to their head, I am absolutely enthralled by the room-scale VR experiences it makes possible. The first time I tried the Vive, I was transported into The Lab by Valve, and I came out of VR expecting the teleporting mechanics to work in real life. Almost immediately upon taking off the headset I turned to my friend Julius and said, "We need to develop something for this. Something cool."

Fast forward to when we were both out of school and actually had Vive headsets with the space to set them up (because for a while my apartment wasn't big enough to handle the minimum room-scale size in addition to all the stuff I have). My friend and I decided to do a Vive game jam one weekend, and I thought it would be cool to try attempting stealth mechanics in VR--a decision which was probably fueled by the many hours I had recently invested in playing Horizon Zero Dawn.

As it turns out, making an entire stealth game in one weekend was probably a bit of a pipe dream, but we did get a good baseline to revisit in the future should we decide to take it further (we're currently devoting our free time to making a mobile game which I'll post about at a later date). Developing for the Vive is unlike anything else for a number of reasons, and a bunch of wrenches were thrown in the development process when I realized how easy it is to wall hack in room-scale.

A bit of context for those of you who may not know what I mean by "wall hack": Let's say you're playing a VR game in the Vive. The main requirement for room-scale VR is that you've got a nice, clear play area, which means that you have an entire rectangle to walk around freely in, despite the fact that there may be barriers in the game you're playing. When I say players can "wall hack", what I mean is that they can clip right on through the in-game walls as if they were nothing, because they can physically walk through them with no problem.

There's even a cool particle effect!
The basic premise of the game is that you're trying to break into a laboratory to download some data off of a computer while trying to avoid the patrol robots that are guarding it. Most of the code I wrote that weekend and the few days following it was focused on the main movement mechanic of the game: being able to throw a ball and teleport to wherever it lands. The same ball can also be thrown at the power switch on the back of a patrolling robot to shut it off.

I'm pretty terrible at aiming.
Getting the arc that the ball should be thrown at and having it bounce off the objects in the room was mostly trivial. I employed the use of physics materials to get it to bounce the way we wanted, and tracked the motion of the player's hand to get the throw trajectory and power. Even getting the proper offset between the player and the camera rig to teleport the player directly above the ball was super simple. The biggest issues turned out to be usability issues (I might make the robot power switch a larger target, for example).

The ball turns green when it stops.
Okay, so maybe it's more of a teal.
For obvious reasons, we only want the player to be able to teleport to the ball when it's stopped. However, being able to tell when the ball stops moving is much harder when it's far away. The solution to this problem was really simple: have the ball change color when it stops. It worked like a charm, except for in certain cases.

It's like having x-ray vision!
What if the player throws the ball behind a wall? In a game about sneaking around corners and past various objects there are probably a lot of scenarios where the place you want to be is obscured by the thing you're currently hiding behind. How do you tell where the ball is if you can't see it? The answer came in the form of a custom shader. I applied a different material to the ball such that it would draw in a solid color if it was behind another object. It made it a hell of a lot easier to tell when you were able to teleport and where you'd actually end up.

I almost used yellow instead of red.
One of the things I thought about early on was that players shouldn't be able to teleport to just anywhere the ball stops. There needs to be enough vertical clearance that the player can stand up wherever the ball lands, as well as enough horizontal clearance that there isn't a wall directly in the player's face when they teleport. These restrictions were already implemented when I was doing usability testing, so, in a few cases, the ball would stop and turn green but I wouldn't be able to teleport to it, and I realized that I didn't have any sort of indicator for when the ball was stopped in an invalid location (so I added one and hey look at that it's red instead of green).

You can't tell, but I'm trying to throw it.
After getting these feedback mechanisms set up, I decided to see in what ways I could break the game. One of the things I noticed is that I could release the ball inside a solid object and get it to pop out of the side opposite where I was standing, which was obviously not something I wanted players to be able to do. To remedy this, I don't allow the ball to be thrown when it's inside a wall, or if it has been inside a wall at some point during the last few frames. The ball will turn red to indicate that it can't be thrown.

The extra restrictions worked well in most cases, but what if the player sticks their hand through the wall and drops the ball on the other side? One solution to this is to just make all the walls thick enough that the player can't do this, but you never know how big someone's room-scale space is going to be. The solution I came up with was to raycast from the player's shoulder towards their hand and see if that raycast hits anything, but even this isn't a perfect solution. What if the player's arm is bent around the corner of a wall and the game thinks the player's arm is going straight through the wall? What if the player just steps inside the wall so the raycast doesn't actually hit the outside of the wall at all?

Obviously the biggest problem is dealing with players being able to walk through walls in the first place. The current solution to this is to darken the screen and change the camera's culling mask so it doesn't draw any of the robots--this way you can't look through the wall to peek at the robots' locations. There are still a lot of problems with this, however; what if the player walks into the wall just to hide from the robots and stay out of reach? What if they walk through the wall to the other side and play from there? In the future, I'll probably change this so that certain functions of the game will stop until the player goes back to where they were before stepping into the wall. It might also be necessary to see robot locations through walls somehow so the player doesn't have to rely strictly on audio cues (I mean, hey, Horizon Zero Dawn lets you peek at enemies through walls and that can be pretty crucial for stealth sometimes).

The yellow lines represent the robot's view frustum.
Currently, the robots aren't actually worth being stealthy around--they only exist to patrol and be turned off by the player. The chasing/searching AI doesn't exist yet, but all the building blocks are there. I built a patrol route editor and a view frustum editor, both of which have custom scene view GUI and some inspector buttons. I'll probably write more about the actual tool itself later, because it's complex enough to warrant having an entire post to itself.

More updates on this project will come when we decide to do some more work on it, but for now I'm focusing my attention on a mobile game in my free time instead, so stay tuned for some info on how that's going. Until next time!

--JBird

Sunday, April 2, 2017

Hashtag Reboot

Hey everyone! JBird here, coming back from the dead to break the long silence! A lot of stuff happened in rapid succession for a while there, and writing blog posts took a back seat. That isn't to say I haven't been working on stuff, I just haven't been able to write about it. I'll get everyone caught up with what projects I've been working on in a little bit, but first I want to talk about what's been going on with me.

I've lived in five different places since I graduated about ten months ago. Working as a seasonal employee and getting your end date extended multiple times will do that to a person, I guess. The moves have been hectic, but the folks over at 1st Playable Productions in Troy made it worth it. 10/10 would work for them again.

I also built a new computer and got an HTC Vive! Virtual reality is friggin' sweet, and I've gotten a few chances to develop VR applications for various platforms, but the Vive takes the cake when it comes to VR headsets. It lets you walk around in VR. Once more for the people in the back: you can walk around in VR. So cool! Details of my exploits with Vive development will come at a later date.

So what can you expect to hear about in the next series of posts?

~ Making a modular ship-builder for an Asteroids-like game.
~ Adventures with VR stealth.
~ The trials and tribulations of making a camera for a 2D sidescroller.
~ And probably some other stuff, I'd imagine!

I've also started doing a podcast thing with some friends. We're still trying to find a permanent home for that, but you can bet I'll plug the crap out of that when we've established it a bit more.

Anyway, more posts coming your way soon! Stay tuned!

--JBird

(I just noticed that the only other posts I made to this blog were literally last April. Guess I just like doing dev blog stuff in April for some reason. Huh.)

Monday, April 18, 2016

Hashtag Enlightened

In my first post, I promised step-by-step instructions on how to waste eight hours building lighting for a game, and I think the time has come to deliver. The amazing thing I learned about Unity3D's Enlighten (which is the part of the engine responsible for baking the lighting) has come up in conversation quite often lately, and I realized that a lot of other people have had the same problem I had.

Short disclaimer before we begin: I'm a big fan of Unity3D, as I use it for just about every project I do lately. That said, sometimes even the people we consider to be our closest friends can do some really stupid shit. It doesn't make them any less of a friend, but you know we can't just let them live that down.

So let's just get right to the step-by-step guide, ladies and gents (but first, a little bit of context).

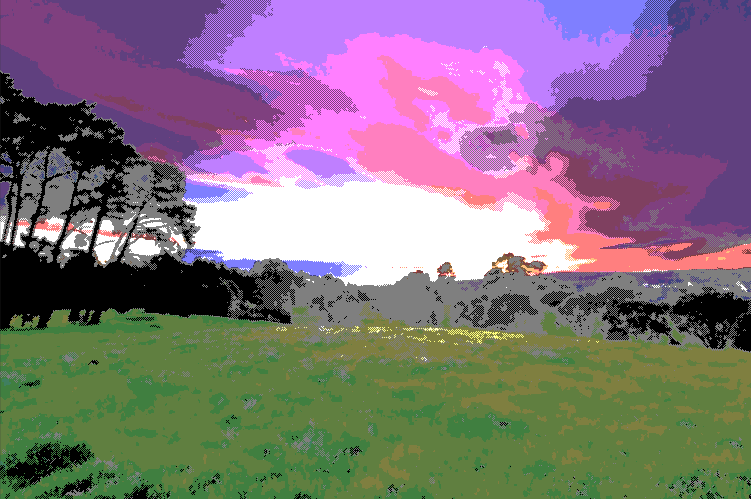
You may have heard me talk about the World of Plankton Project, because that's arguably the biggest project I'm working on at the moment. If you haven't, I'll probably do a post explaining it in more depth--but for now all you really need to know is that it's an educational simulation of freshwater ecology and all the fun stuff that entails.

Anyway, as project manager of World of Plankton, I have a lot of duties--one of which is making sure we have working builds for certain milestones. On top of that, one of our milestones also required me to make a video showing off what the project is so far.

Sidenote: I don't claim to know anything about making or editing videos. I had never used OBS or any other video capture software before making the WoP demo reel. If you're also using video capture software for the first time, you might want to listen to the following advice:

If you're going to make a video using OBS, do not assume that, just because you've told it to record the video playback from a specific window, it will also record the audio playback from solely that window alone. It won't. It will record the audio from everything else on your computer making noise, including Facebook Messenger if you also have that open; and--in case you're so used to hearing that notification sound (because maybe you're in a lot of chats that are often pretty lively)--you should really double-check that the notifications you're hearing are actually from Facebook and not from the video--because let me tell you just how embarrassing it would be if that video was perhaps posted to YouTube and linked to a bunch of people before you were aware that anything was wrong with it. It would certainly suck to have another team member figure it out and tell you what the issue was a full three or so days after you posted the video. Definitely don't let that happen.

Not that I'm necessarily speaking from experience here--this is all strictly hypothetical, of course.

*cough*

But for all intents and purposes, let's say you did release a video with a bunch of random notification sounds in it and didn't know how to remove them without just recording the video again. You'd probably just need to open OBS and take it from the top--but perhaps that seems too simple for you. Maybe you want it to be more of an ordeal, because it just wouldn't be fun any other way. Well, you're in luck. Here's how to waste the maximum amount of time before finally re-recording your video:

Step 1: Open up the project on one of the lab computers that you've been using for the past week or so. Using the same computer as usual should help you avoid having to download all of your data onto a new computer. 

Step 2: Get ready to start doing the video capture. Since you don't have administrator access to the lab computers, you're going to have to run OBS from a flash drive.

Step 3: Realize that the USB ports on the computer you've got all your data on are absolute garbage and have apparently already bent a friend's flash drive out of shape.

Step 4: Decide to boot up the lab computer behind you and take the video capture there instead.

Step 5: Wait approximately ten minutes for SourceTree to download the entire project to the new computer. Then, wait another twenty for Unity3D to load in all of the assets this project has.

Step 5.5 (Optional): Browse Reddit or shitpost in one of your Facebook chats while you wait.

Step 6: Come to the conclusion that you might as well use the most up-to-date version of the project for the new video, since one of your teammates has apparently made some major optimizations to the performance of the project, and we like 1080p 60fps videos because they're buttery smooth.

Step 7: Remember that the data from baking a scene's lighting is only stored locally, and therefore wasn't pushed to this computer when you downloaded all of the data onto it.

Step 8: Start building the lighting in the main scene and wait approximately two minutes for it to finish.

Step 9: Fix some bugs in the main scene and commit the changes.

Step 10: Realize that you have a quiz soon and that you should probably go take it. Hopefully this video capture doesn't take too long.

Step 11: Start building the lighting for the intro scene. This one has a lot of terrain with a lot of trees, so it will probably take a while longer than the other scene.

Step 12: Wait for way longer than you originally thought you would have to.

Step 13: Go take your quiz. Sitting through the entire lecture today is not something your schedule is going to allow for, though; thankfully, the quizzes are at the beginning of class, so you can just go and then come right back.

Step 14: Return to the lab to find that Enlighten is still in the clustering phase. Resign yourself to the fact that this is probably taking a while to bake because it will be that much more optimized at runtime. Convince yourself that the time you're spending is worth it for the project to run smoothly.

Step 15: Wait for other people to come to the lab after their classes are finished. At least now you can talk to someone in person about how obnoxiously long this is taking.

Step 16: Decide that the baking might be taking too long to be worth it and start to tinker with the numbers in Unity's lighting tab to make it build faster. Start making a build on the first computer you booted up which you can then transfer to the second computer once it's done.

Step 17: Realize that the build on the first computer will still have the bugs that you already fixed on the second computer but didn't transfer over. Oh well. At least once it bakes the lighting once it won't have to bake it again, and you can just transfer over the bugfixes and build the project way faster the second time.

Step 18: Wait to determine if the second build is actually going to take any less time than the first.

Step 19: Realize that neither computer will probably be finished for a few hours, and boot up a third computer in an attempt to bake the lighting even faster. Repeat Step 5 with this computer. Leave the other computers running because we've already come too far to turn back at this point.

Step 20: Start messing with the lighting settings to try and reduce the build time. Eventually decide that a low-quality lighting bake is probably fine for how far the camera is from the terrain and start baking the lighting with lower settings.

Step 21: Wait for the low-quality bake to finish, and get increasingly agitated when it appears to stall on one of the final steps.

Step 22: Look up what the potential problems could be. Tweak more numbers based on suggestions from online forums.

Step 23: Repeat Step 21. If you've followed the steps precisely up to this point, you should notice that the bake is faster, but still stalls in the same spot.

Step 24: Go eat dinner because you've been at this for hours and haven't eaten a damn thing since lunch.

Step 25: Come back to the lab and check on the progress of your first and second builds. Getting close, but still another hour or so to go, you estimate.

Step 26: Go back to the forums to find out why this stupid thing is stalling. Pray that the other two builds won't stall when they get to that point, but have a sinking feeling that they will anyway due to Murphy's Law.

Step 27: Decide to stop the first build and start over with terrain set to lightmap static. You have no idea why that wasn't the case earlier, but you think that'll probably make it go a little bit faster. Keep the second build going just in case it isn't. You decide that you want this build to have high-quality lighting, because you can just make a low-quality build on the third computer in the meantime.

Step 28: Make a low-quality build on the third computer in the meantime.

Step 29: Watch it get to the same point where it always stalls, albeit in record time. Poke around the forums some more. Someone else must have encountered this bug. There has to be an answer somewhere.

Step 30: Notice that both of your other builds have stalled at the same point as the one on the third computer. Contemplate defenestrating one of the lab computers to make yourself feel better. Decide against it because you can't afford to replace one of these workstations. 

Step 31: Pantomime defenestrating a computer instead to one of your colleagues who understands just how fed up you are with this whole thing.

Step 32: Go back to the forums and read that perhaps the reason you're having trouble is because you have a primitive shape in your scene (e.g. a cube, a sphere, etc.). Think to yourself how ridiculous this sounds and how stupid it would be if it actually solved the problem. Why would a simple shape be giving Enlighten such a hard time?

Step 33: Search through the scene hierarchy for primitive shapes. Find and delete a cube. Start baking the lighting again. Assuming you've done everything correctly up to this point, you should notice that the lighting takes a little under two minutes to complete, and no longer stalls right before finishing. They've got to be kidding you.

Step 34: Shout obscenities.

Step 35: Stop your other two builds. You're just going to use the one with the low-quality settings because it doesn't even make that much of a difference from that far away and it's been way too long for you to care anymore.

Step 36: Load up OBS and re-record the demo reel, making sure to have all other applications closed before you start.

Step 37: Edit the video using Adobe Premiere Pro.

Step 38: Remove the old video from YouTube and upload the new one to your channel. Wait approximately four minutes for it to finish uploading.

And there you go! If you've done everything correctly, you should have wasted approximately eight hours before simply removing a cube from your scene and setting the terrain to lightmap static. If you've reconsidered and just want to do things the easy way, simply do steps 4, 5, 9, 33, and then 36-38.

I hope you found this step-by-step guide to be helpful, and I urge you to leave a comment if you have any questions.

Until next time!
--JBird

Tuesday, April 12, 2016

Hashtag Pixels

Hello again, everyone! Got another color-related update for you here. I'm getting really excited about the kinds of effects I can do with some simple application of color theory, and I wanted to share my findings so far.

So I've been working hard on this pixelation shader of mine, and the most interesting part for me has been deciding how to clamp the colors from the original image. So far I've tried five different methods, four of which have had some pretty cool results (the other one just looks ugly, to be perfectly honest). Below are the different methods the shader currently supports and an example of how each of them transformed the base image I used.

Original Image

I wanted to make sure the base image I was using had a good representation of varying hues and high contrast. I just found this image on the internet and decided it fit my criteria well enough (it's also a pretty cool landscape shot on its own).


51-Color Palette

This is the first iteration of the shader I mentioned in my last post. I can reiterate how it works, but all you really need to know is that it creates a palette of 51 colors. Because the colors in the palette are mostly desaturated, this picture is probably the least vibrant of the ones shown here. I want to extend this palette to have a bit more variety of saturation and value, but that'll come later.


Vaporwave Clamp

The vaporwave palette is honestly a very interesting one. I did a little bit of research on it, and the main thing I noticed is that there's no representation of hues between yellow and green--which you can probably tell by the stark contrast in grass hues here. It's also a bit washed out, which makes for a pretty interesting A E S T H E T I C. I'm really happy with how it came out.


NES Color Palette

After doing some research on the color palettes used by old gaming consoles, I decided to emulate the old Nintendo Entertainment System palette. This one is very similar to my 51-Color implementation (it actually only has 52 colors), but it has less tolerance for saturation. Colors in the NES palette were apparently either entirely saturated or grayscale, with no in-between. As such, I added a slider to increase the saturation threshhold for this mode (the image was almost entirely grayscale without it).

GBA Grayscale Ramp (Pastel Mix)

I think this one might be my favorite so far. This mode actually just clamps the image to 4 shades of gray (as opposed to 50), and then replaces the grays with a user-defined palette of 4 colors. This palette is the old Game Boy Color "pastel mix", which you could activate by playing an old Game Boy game in a Game Boy Color and then holding down on the D-pad when turning it on. There were apparently 12 different palettes you could activate in similar ways, but this one is my favorite.


And that's it for now. I'll probably be working even more on this shader, but I wanted to post this update showing my progress so far, because I think all of this stuff is super cool.

Thanks again for reading, and I'll see you all soon!
--JBird

Saturday, April 9, 2016

Hashtag Chromancy

Okay, yes, I hear what you're saying: "That's not a real word, Justin. You can't just make up words and put them in hashtags like that." Don't worry, I hear you; but have you perhaps considered the possibility that "shut up"? Dr. Seuss made up words all the time, and he was a totally-certified actual doctor. No one ever gave him any flak for making things up.

"What is that word even supposed to mean, though?" some of you continue to say. Well, I'll tell you! The prefix "chrom-" denotes that the word has something to do with color, and the suffix "-mancy" implies the seeking of knowledge by means of the accompanying prefix (usually with some sort of mystical connotation). As such, "chromancy" is how I refer to my recent studies of color theory and various different mathematical formulae relating to color.

"Doesn't that word imply that you're magical, though? You're not magical," you chastise. I mean, no, not in the strictest definition; but technology is basically indistinguishable from magic, so, in a way, all computer scientists are basically wizards.

Just... just let me have this one.

Anyway, enough with the nomenclature discussion--let's talk colors. I've learned a lot about color over the past semester or so, and there's a lot more to it than you'd expect. For one thing, there are a variety ways to define a given color--of which, I've focused on three in particular:

RGB (Red-Green-Blue): This is the way computers actually display color (as a composite of red, green, and blue light). You've probably heard of this one, even if you aren't incredibly tech-savvy. All colors need to be converted to RGB in order to be used by a computer; but it isn't always the best format to work with from an artistic standpoint, because transitioning from one color to another behaves differently from what we expect (computers are just weird like that).

HSV (Hue-Saturation-Value): If you've ever worked with any sort of computer art program, you've probably seen an HSV color picker--it's the one that has the rainbow slider (for selecting a hue), next to which is a box of every tint and shade of the hue that's currently selected. Sometimes the rainbow slider is actually a circle around the box instead, because hue is measured in degrees from 0 to 360. HSV is much better than RGB for interpolating between colors, because it behaves in a way that's more like what we expect. For example: if we wanted to slowly change an object's color from red to green, we'd expect it to pass through orange and yellow on the way, not through brown (the latter of which is what RGB does and it looks gross).

Luma-Chroma (or Luminance and Chrominance): This is one that I hadn't learned about until recently, and is apparently the way that television displays used to be encoded (and perhaps still are? I don't know). It basically separates the color of the image (chroma) from the lightness of the image (luma). If you tried to visualize just the luma component by itself, you'd have a grayscale representation of the image in question. In this scenario, the chroma component would basically be like a colorful, translucent overlay that you can put over the top of the grayscale image to get the image you started with.

CMYK is also a thing, but I'm ignoring it because it's generally only used for things that you plan to print (and it's a pain in the ass to reliably convert to from any of the other formats).

Most of what I've been doing with color lately has involved switching between these three different formats and then doing fancy math stuff to get the result I want. Generally, I tend to start and end with RGB, because that's what the computer recognizes as a color, and I almost always calculate the hue from the RGB color--as HSV and Luma-Chroma both use it (chroma is actually just hue and saturation combined).

Here are some examples of what I've done with color (with a brief explanation of how I did each):

Single-Hue Shader:

This one is actually super easy to implement. I have a box for inputting the desired hue (in this case, a kind of greenish cyan) which the shader takes in as a value between 0 and 360. All the shader does afterwards is calculate the saturation and value from each color in the image, and then use those values in conjunction with the hue from the input field to convert back to RGB. This shader also has scan lines and makes the image flicker a bit, which I added to make it look like a hologram projector.


CRT Shader:

Oh look, the scan lines again! I actually made this shader after I made the first one, so I used the same formula for adding scan lines. This time, however, I didn't use HSV. Instead, I only used the red, green, or blue value of each pixel depending on where it was located in the image. In this way, I attempted to emulate what a CRT screen would look like--because each cell in a CRT screen only emits either red, green, or blue light. I was actually kind of shocked that the colors were still recognizable. Our eyes sure are weird.


Pixelation Shader:

Of all the shaders I've made so far, this is the one I'm the proudest of. I was inspired by Lazerhorse's style after watching a certain music video, and I felt compelled to make a pixel-art shader. There's still a long way to go with this before I can get it to the level I want it to be at, but I think it's a good start.

The two biggest pieces of this shader are the "hue-clamping" and "checkerboarding" functions. Currently, the shader converts all of the colors to HSV, and then rounds the hues to the nearest multiple of 30 (which means there are only 12 possible hues in the final image). After the hue has been clamped, the saturation and value are each clamped to the closest multiple of 0.5, with a slight bias based on the position of each pixel--this is what makes the "checkerboarding" effect happen (which is the thing from the music video I most wanted to emulate). The result is an image that contains a maximum of 51 colors--4 for each hue and 3 grayscale (white, black, and 50% grey)--though it would probably end up being less in practice, depending on the colors present in the original image. World of Plankton (the research project I've been working on for almost a year here at RPI) has primarily greens with a few yellows, so the picture below is highly monochromatic.


Disclaimer: World of Plankton will not actually be using this shader in the final version, I just wanted to see what it would do with a more complex image than the three primitive shapes I have above.

Anyway, I think I'll probably start to wrap this post up. I'll definitely do another post about color in the near future, because there's a lot I still want to touch on, and I'll hopefully be working more on this shader as part of a final project (I need an academic excuse to do it or I won't be able to justify setting aside the time), so I should have updates at some point. I also want to expand upon the color palette tool I made for Unity3D and make it more flexible, because I think it could be really useful if it had a bit more functionality--and perhaps I'll even make it interface with a future version of the pixelation shader so we can do some really  A E S T H E T I C  stuff. We'll see what happens, I suppose.

That's it for now, guys; thanks again for reading, and I'll have another post up soon!
--JBird

Wednesday, April 6, 2016

Hashtag Hash Slash Tag

I'm equal parts sorry and not sorry for that title. I honestly had no choice, given the subject matter of this post. All will be clear soon enough. Allow me to explain myself:

So a few months ago I started making a framework for Unity3D that lets developers add branching stories to their projects. I wanted it to be super flexible and relatively easy to use, while still offering more functionality for anyone who wanted to do more with it.

The biggest feature of my framework (which I've taken to calling "RenUnity" as an homage to the Python-based visual novel framework, RenPy) is the ability to insert commands into the dialogue. These commands control when the dialogue box appears and disappears, as well as what buttons show up and what they say, etc. Each command starts with a forward slash (e.g. /jump, /option, /mood), similarly to how commands are entered into the chat log in Minecraft.

So that's where the "slash" in the title comes from. I'll explain the other two shortly, but first I'd like to take a moment to appreciate Undertale and Toby Fox's amazing ability to somehow have great delivery in a text-based medium. It baffles me how well he can convey emotions with slight changes in character expressions and well-timed pauses in dialogue. If only I could be that good, I often think to myself. I want to give my dialogue that kind of flair, too.

I decided that I could have that kind of finer-grained control over the flow of dialogue if I wanted--all I had to do was code the dialogue box to be that way. So I did.

On top of being able to control the base speed that the text is written to the box, I added single-character commands for controlling the speed of certain words. For instance: /d would double the speed, and /h would halve it. I also had /q for quarter speed and /f for four-times speed. Pretty nifty.

But what if I want to pause between words? I added /p for small pauses, which can be chained together for longer pauses. What if I want to write an entire word instantly? I made /i do just that. What if I want text to backspace itself after it's written? Got some /b for that action. Who knows if I'll ever actually use it, but it's there if I ever want to.

I was so excited about the control mechanisms I added into my nifty little dialogue box that I decided to just mess around with them a bunch--and then I realized the fatal flaw in my design: I used forward slashes for everything, even though there are two different parsers. Whoops. That'll inevitably break something unless I figure out a way to change it, I thought. Gotta find another character to use for these commands instead of a slash. But what character could I possibly use? There's such a large number of special characters to choose from! How am I supposed to make such a difficult decision?

(It's probably very obvious now that I'm stalling for dramatic tension. You can very clearly see where this is going, because you read the title of this post--unless you didn't due to some bizarre vendetta against blog post titles. That would be a super weird vendetta, though; you should probably just let that one go.)

Ladies and gentlemen, I implore you to find a circumstance where I could possibly turn down using my favorite character for the purpose of replacing the forward slash. What's my favorite character, you ask? Why, that should be pretty obvious--the hashtag!

What? You call it a "pound sign"? That's a dumb name. It prefers being called a "hashtag", and I'd thank you to respect its wishes.

So okay. Now you know about the "hash commands" and "slash commands" I implemented. But what about the "tag" part of the title? This is where it starts to get fun (unless you're not lame like me and you don't think formatting text is fun).

If you've ever programmed in html, or even written a word document, you probably know about bold-facing and italicizing, as well as changing the size and/or color of your words. I was led to believe that text boxes in Unity3D were not capable of such things, and had accepted that I would not be able to do the Zelda-esque technique of "this word is a different color and is therefore important".

I accepted this, that is, until yesterday.

Yesterday I learned that my wildest dreams were, in fact, possible. I could have my syntax-highlighted cake and eat it, too. Unity3D text boxes have the ability to support "Rich Text", which is just a fancy way of saying you can use html-style tags (oh snap, there it is) to bold-face and italicize individual words instead of formatting the entire text box as a whole.

Unfortunately, because of the nature of my dialogue box as it was, I couldn't just immediately add html tags and think everything would turn out exactly as I wanted. In order for an html tag to work, it needs to be in a pair (e.g. <i>this text would be italicized</i>). Because the "</i>" wouldn't be added until the entire phrase had been written, the words wouldn't be italicized until the very end.

After some fancy computer sorcery, I wrote a system that allows for each character to be written exactly as it would appear when all the tags are in place (this involves me taking the tags out at the start and putting them back in later when I need to, which is kind of a hassle, but ultimately worth it).

So yeah. If you want to see the specifics of what my code looks like, you can go to my GitHub page and check it out. If you want to stop reading my ramblings about text formatting, well, you're in luck! This is the end of this blog post.

Thanks to everyone who stuck it out until the end, and thanks in advance to anyone who leaves a comment letting me know what they thought (unless you were mean about it)! I'll probably be getting to the topics I mentioned in my first post next time--I just did a really cool thing yesterday/today that I wanted to share, so I wrote this, instead.

Until next time!
--JBird

Monday, April 4, 2016

Hashtag Devtalk

Oh geez, would you look at that? It's an entirely new blog! What's the deal with this, I wonder?

Well, actually, I don't wonder. I know exactly what's going on here, but perhaps you might be wondering what this is all about. What is this new blog, you ask? Why is there a new thing happening? You don't like new things; new things are scary and different. Don't worry, I shall explain everything very soon.

So if you're aware of my other blog, Hashtag Realtalk with J-Bird, you might already know me and my antics. You might also know me from wherever it was you found the link that you clicked which brought you here. If, by some chance, you don't already know me, you might want to stop reading for a second and buckle your seatbelt first. Don't worry, I'll wait. All set? Okay, cool.

The first thing you might ask is "Woah hey, where'd the hyphen in your nickname go?" It's gone forever, I'm sorry. Since I started making JBirdEngine, I've sort of phased it out because it's not syntactically correct to put a hyphen in a variable name or a namespace. I know this probably deeply offends at least one person. I did it specifically to spite you (no I didn't).

The other, more important question you might have is "What's this 'devtalk' business all about?" Well, I'm glad you finally asked, because otherwise I would've been rambling about stupid nonsense for this entire post without getting to my point. Seriously, what took you so long? You think I'm just here pretending to talk to an audience and doing things at a predetermined pace? Honestly.

While my other blog doesn't really have a focus aside from me kind of throwing words at the internet and seeing what sticks, this blog is meant to be a chronicling of some of the stuff that happens in my life as a developer. I'll be talking about stuff that I've made and cool experiences I've had, as well as offering anecdotes of time wasted in an attempt to make sure anyone reading doesn't make the same mistakes that I did. I really can't stress enough how much I want to help other people learn from my mistakes (I think I even wrote a post about it on my other blog). Let me make a mess of my code so you don't have to; I don't mind.

Some stuff you can expect soon:
  ~ Me talking about color theory, Bob Ross, and some stuff from JBirdEngine's color library.
  ~ Serialization in Unity3D: A Forced Text Adventure or How To Royally Git Rekt.
  ~ Step-by-step instructions on how to waste eight hours building lighting for a game.
  ~ And probably some stuff about making editor tools or generic helper functions, I dunno. We'll see.

I might also put up a post introducing myself as a developer so that you guys can get the gist of what I do--even if you don't develop stuff yourself. I want to make this blog just as accessible as my other one, so--while there will definitely be some technical jargon--I'm going to give my best attempt at entertaining a wide audience (and if there's ever a post that's super technical I'll be sure to warn you beforehand).

And that's about it, I guess. Hm? What's that? "Will you still be updating your other blog?" If I have something to talk about that isn't related to game dev, yes, I will be putting it there. I currently have a lot of topics to write about here, however; so I won't be writing any Hashtag Realtalks for a while (unless I decide to finish one of the drafts I've been working on for a little while; we'll see). Don't worry, though, I'm still going to write out the word "Hashtag" before all of my posts--because if there's one thing you can count on me for, it's running jokes into the ground.

And that's really it this time. I hope to see you all soon, and if there's anything you want me to talk about, you can leave a comment (or bug me about it in person or on social media if that's your game).

See you all soon!
--JBird

P.S. The style of this webpage is still subject to change. I need to tinker with it a bit to make it better.